Adjusting Neck Width
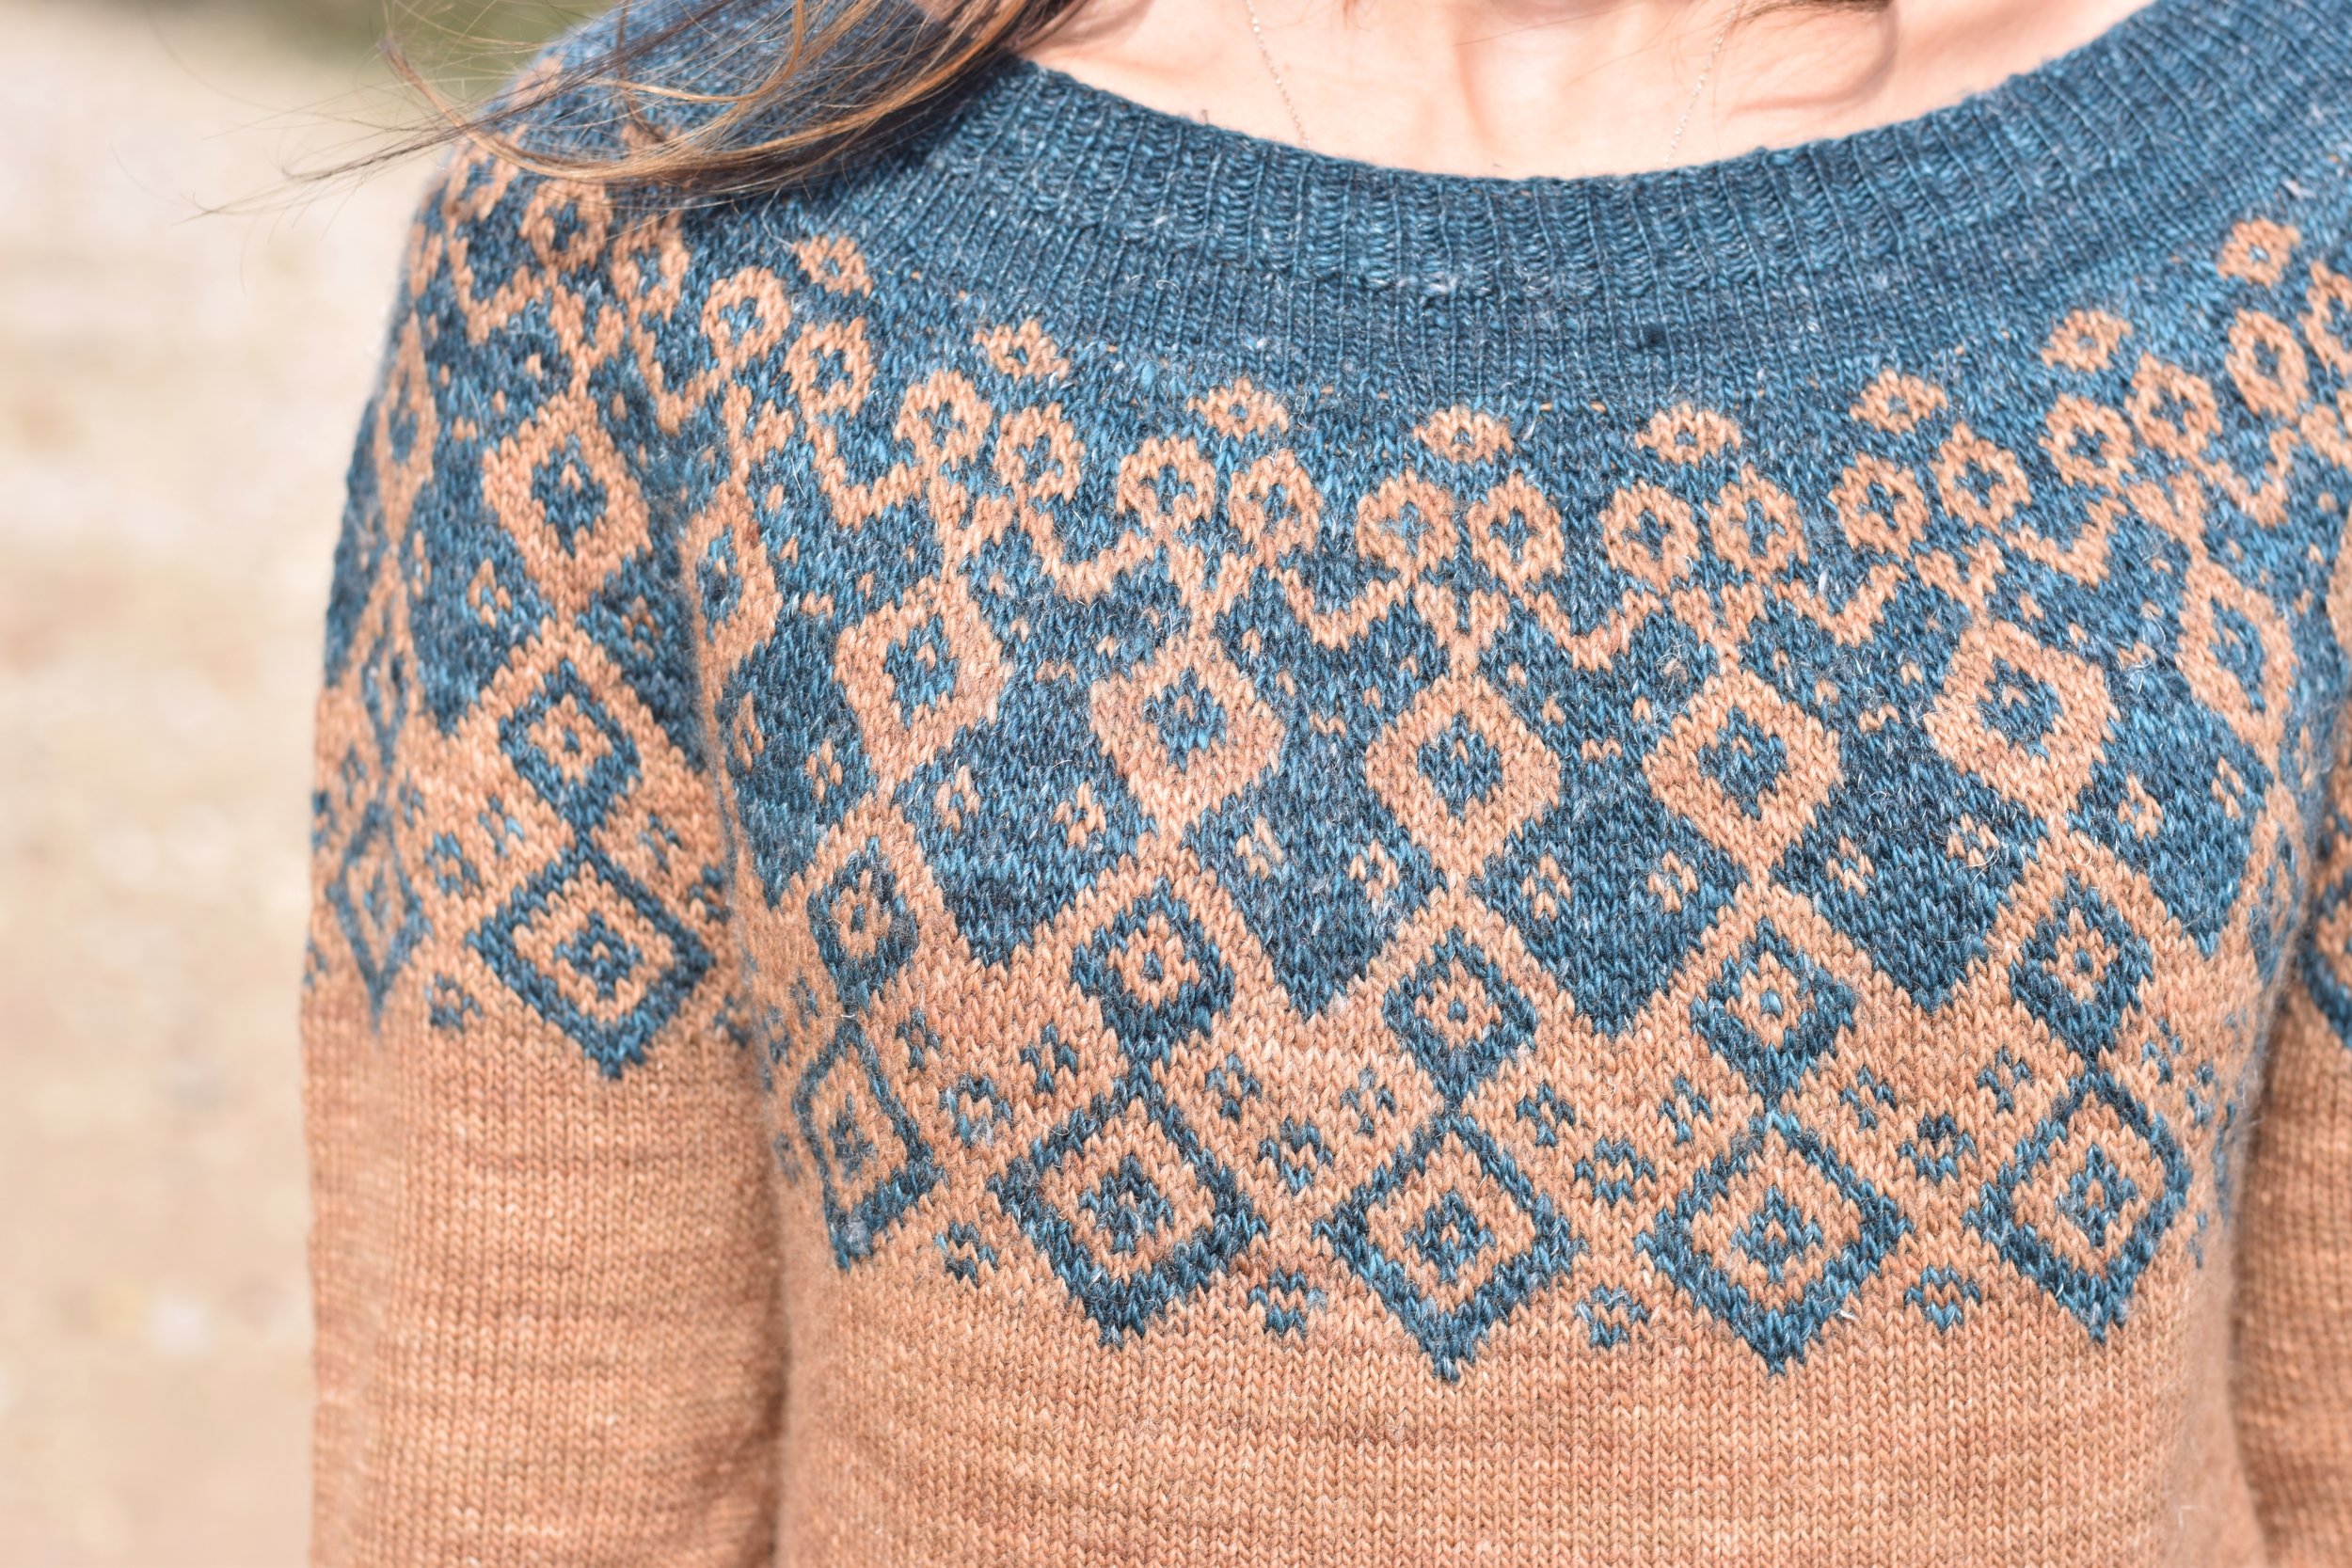
I prefer a wider neck on my top-down yokes, but you may not. In the original, the neck width in the sample size is 23.5” or 58.5cm.
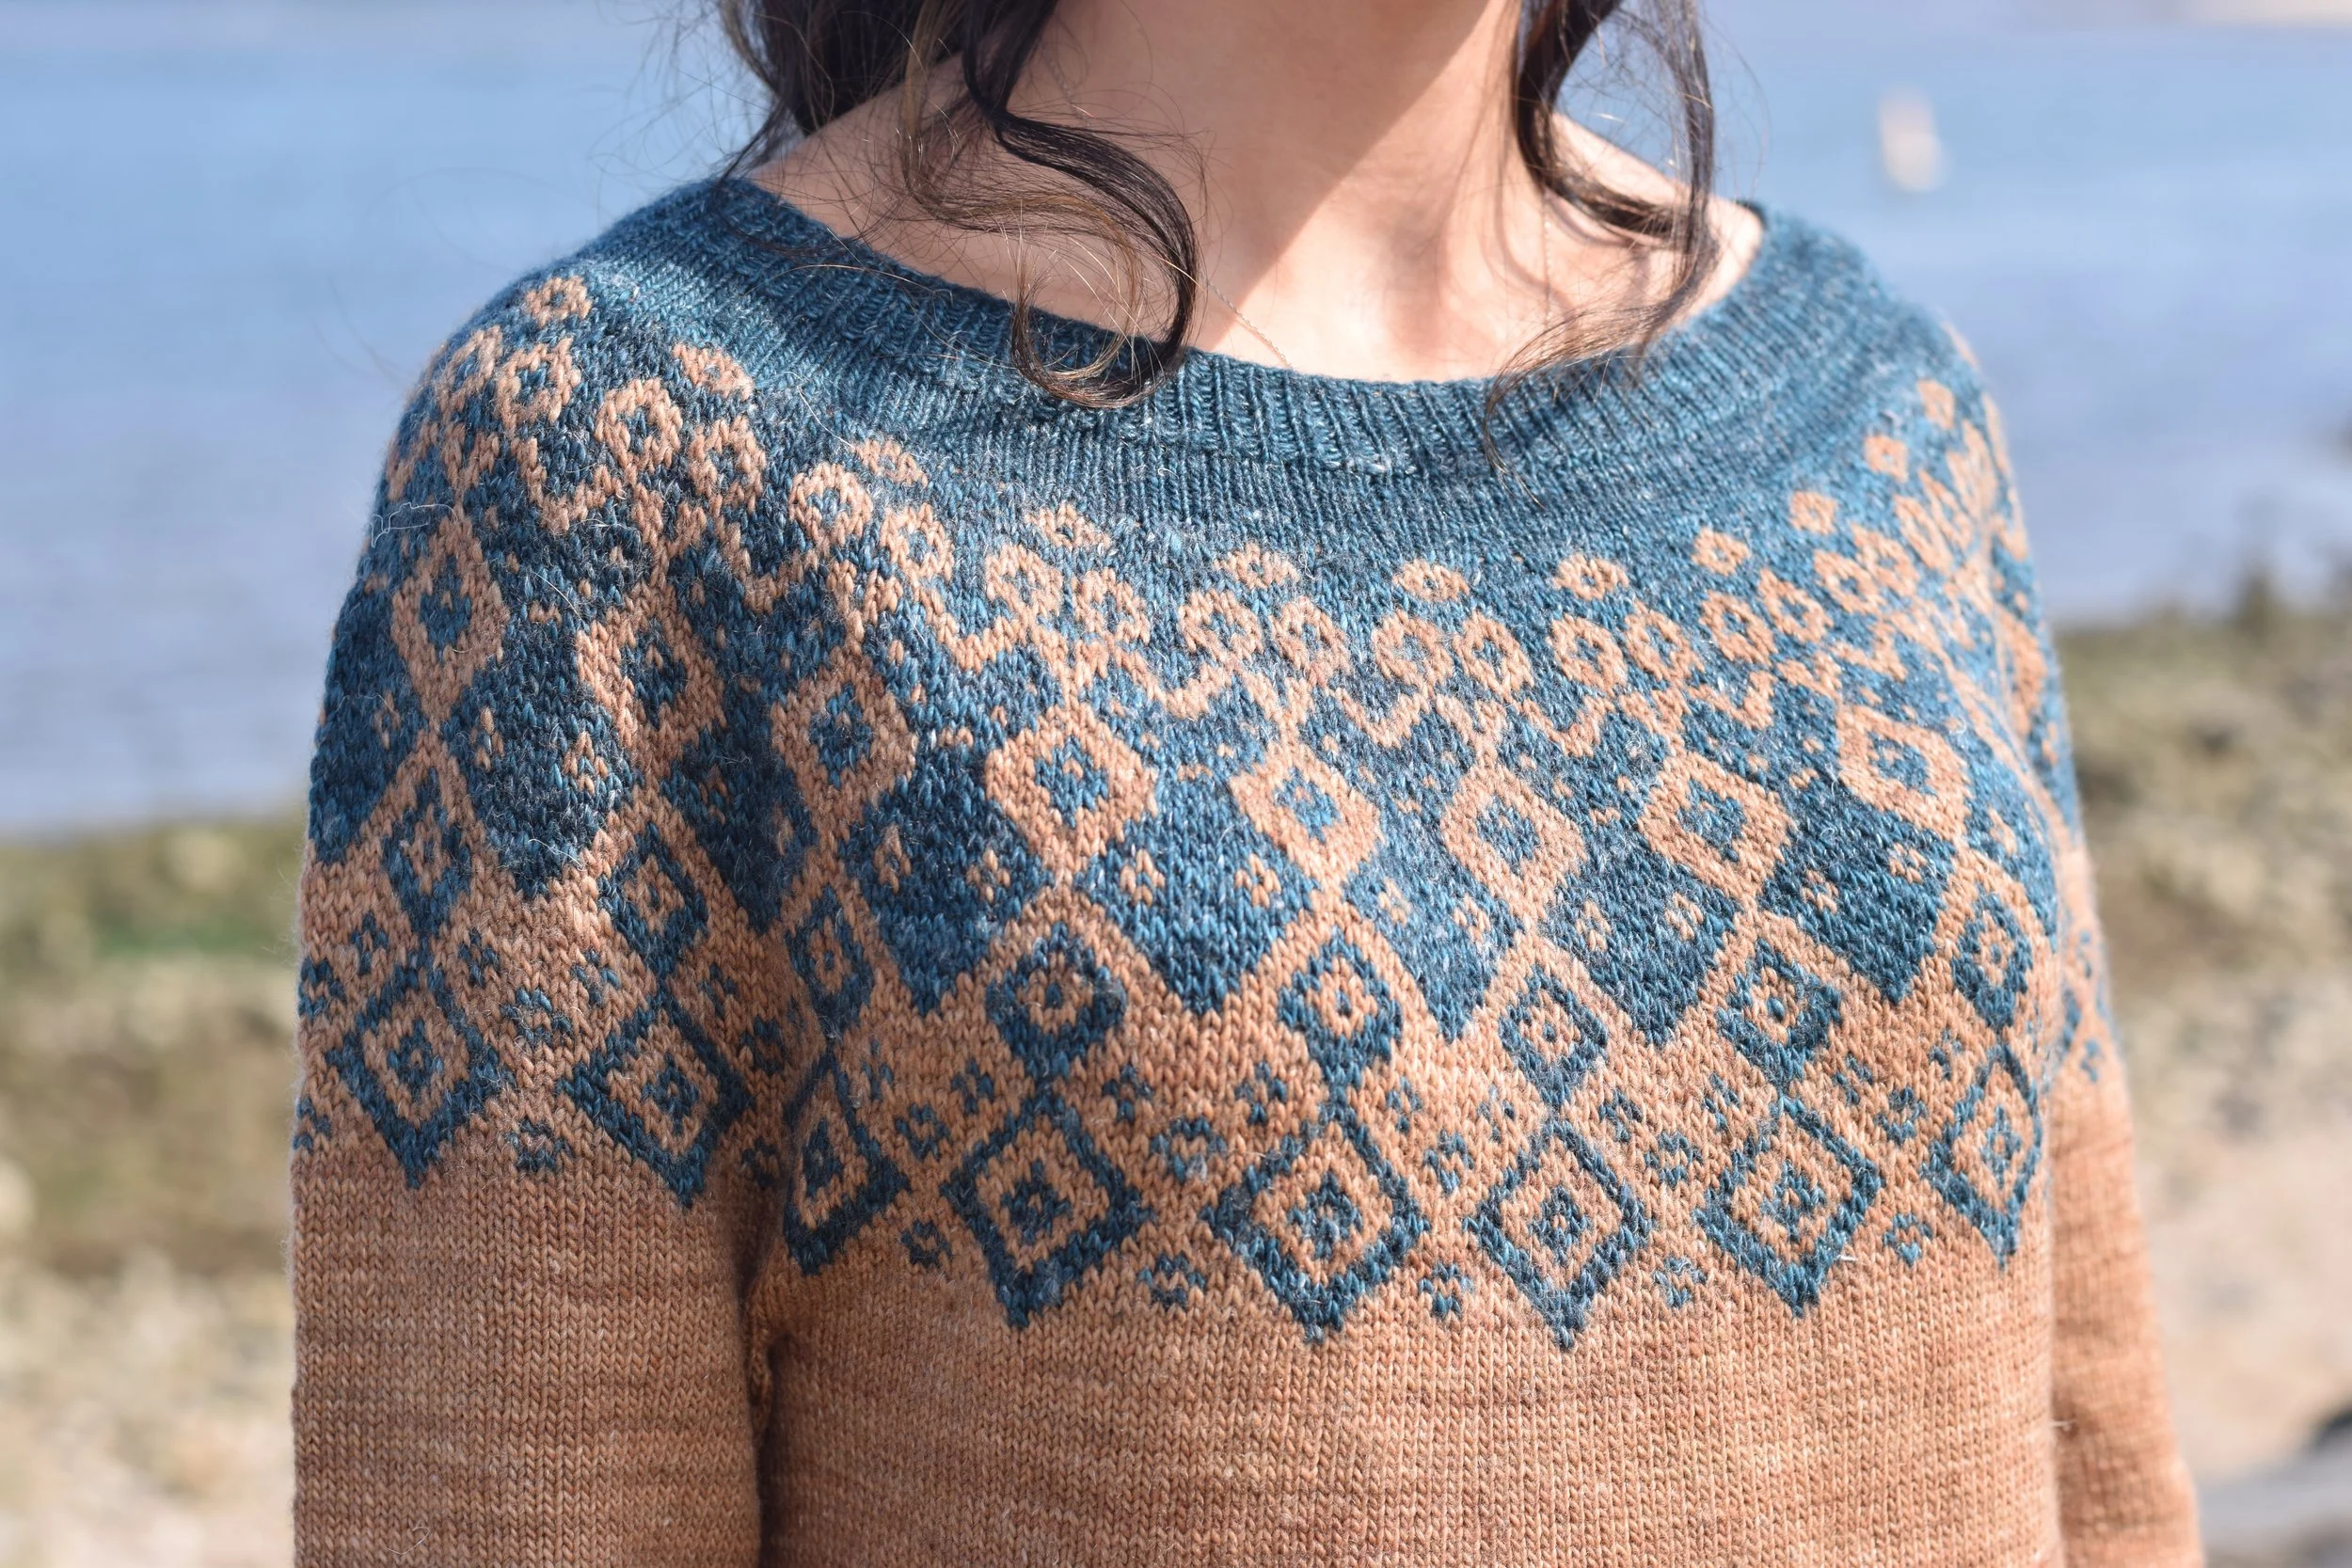
Taybern Light
Neck width easily adjustable and only requires some quick math. I’ll be using inches for this exercise, but if you use centimeters. The steps are exactly the same.
First figure out how wide you’d like your neck to be, remembering that you’ll need to get this over your head. (If you don’t have any idea, try on a sweater you like and measure the neck.) Most adult heads are between 18 and 22” and knitting stretches a bit, so see what you’re comfortable with.
First, figure out the number of stitches per inch in the ribbing gauge. This is usually given in 4 inches (or 10cm), so divide the gauge by 4 (10). In Taybern Light, the ribbing gauge is 31 sts, so I’ll divide 31 by 4 which gives me 7.75 sts per inch.
Multiply the desired neck width by the number of stitches per inch in the ribbing gauge, so if you’d like a 20” neck width, multiply 20 x 7.75 for a total of 155 sts. We’ll have to adjust this because it’s 1x1 ribbing, which is a multiple of 2 sts in the round, so we need an even number. Make this 154 or 156 sts. I’ll choose to use 154 sts.
The original number of ribbing stitches in my size was 182. That means I’ll need to increase 28 sts more. You can do this two ways: you can add the 28 to the original first increase round of 34 sts to get to 62 sts, but my preferred way would be to work the initial increase round of 34 sts, work a few rounds even and then increase those additional 28 sts in the next round.
All of my patterns come with a link to a handy increase/decrease calculator, so this is math you won’t have to do!

Math Monday: Sleeve Magic
Recently two sleeve-related incidents happened at the same time. I finished my Daytripper Cardigan by Mary Jane Mucklestone and decided not to do the sleeve shaping at all. My decision was made because there were so few decreases and I kind of like my cardigan sleeves looser so I can wear a long-sleeve something underneath.
My Daytripper before steeking.
Then I tuned into the Girl Meets Yarn podcast by Marilsa Lugo (IG: @marilisalugo) on YouTube. Don’t ask me which episode because I watch them in my car on my l-o-n-g drive to work - ssssh! don’t tell a cop. She was saying that she likes to make decreases in her sleeves every two inches or so.
I thought it might be a perfect opportunity to address how to figure out how to shape your sleeves … with a little math, of course.
First, let’s get some things straight. Both my Daytripper and Marilisa’s sweater sleeves were knitted cuff down, meaning there were decreases. You can use the very same math to knit cuff up, only there will be increases. We’ll also say use long sleeves knit in the round for my example, although this will work for any length of sleeves, worked in the round or flat.
Most long sleeves are about 17 to 18” long measured from underarm to wrist. Again, adjust accordingly. My arms are rather long, so I’ll say I want my sleeves to be 18”. It’s bad form to do any shaping at all at the very edges of your work, so let’s say we also will work 1” even at the top of our sleeve and 1” even before we begin the cuff. The cuff will be 2”. So if my total sleeve length is 18” and I get rid of 1” at the top and the bottom and then get rid of the length of the cuff, I’m looking at 14” of sleeve [18 - 1 - 1 - 2 = 14]. We’ll also say that my row gauge is 6 rounds per inch. That means I’ll have 84 rounds to work with [14 x 6 = 84].

Sleeve shaping happens in pairs, usually at the underarm - beginning and end of the round/row.
Now let’s say the upper arm circumference of my sleeve is 90 sts and my cuff circumference is 58 sts. That means I’ll have to get rid of 32 sts. [90 - 58 = 32] Decreases in a sleeve are always worked in pairs - one at the beginning of the round, one at the end - meaning we’ll have 16 pairs of decreases. [32/2 = 16], but since we’re working the very first decrease as soon as we’re done with the 1” even at the top of the sleeve, it will mean that we’ll only have only 15 pairs to work and only 83 rounds to work them since we’ve done it over one round.
Now for our calculations. If you remember in some previous Math Mondays, we use the longer division method. Divide as usual, but take the dividend and add 1; then subtract the remainder from the divisor to get the extended remainder, as follows:

Longer division method….
This means that we’ll work 7 pairs of decreases every 5th round and 8 pairs of decreases every 6th round. Let’s do a little math check:
7 x 5 = 35 8 x 6 = 48 35+48 = 83 rounds 7 pairs + 8 pairs = 15 pairs
The math checks out and we can carry on with our decreases.
How can this help you? Well, suppose you like the shape of the sleeve, but want to shorten it. You’ll have fewer rounds to work with (and also probably fewer decreases because the forearm isn’t quite as narrow as the wrist). Or suppose you like the length but want a puffier sleeve or narrower sleeves. You’ll do more or fewer pairs of decreases.
You’re in charge of the fit. You can do whatever you want.

Fudge Friday: the good in the bad - twisted stitches
I am a self-taught knitter. When I wanted to learn how to knit, there was no living family member who could show me. I worked at a library, so I learned from a book.
It wasn’t so hard.
I knit happily for many years - probably close to 15.
One day, I was sitting in the waiting room of a doctor’s office. My 5-year-old son was in with the doctor without me. I was sad and scared and worried. I had brought my knitting and I was knitting and I was crying. I didn’t want anyone to see me.
Things got blurry and I was still knitting. So I blinked my eyes really hard. Ever do that? Things become hyper clear. You’re trying to focus. I pulled my knitting up closer to my eyes. I was trying to make people around me think I was really concentrating on my knitting - I wasn’t.
But as I looked very carefully at those stitches, I saw that at the base of each stitch, there was little twist. I looked again. The stitches were TWISTED. What the heck!? I continued to knit the twisted stitches until I got home.
Back to the library. Back to the books.
I discovered I’d been knitting into back leg of my knit stitches instead of the front leg. No wonder my knitting was tight and I could rarely get gauge. Quite the revelation. I had to work at breaking the muscle memory of knitting into the back leg of the stitch and I could no longer knit as fast as I previously could because of it. It took me awhile to break the habit. But not too long.
My son? It all turned out fine….good even. My knitting? It improved. A few years after that I started designing. What did I learn from the experience?
It’s never as bad as you think it is.
Time fixes a lot of things.
Crying can be good for you, in more than just the usual way.
There’s always a little bit of good in even a big bit of bad.

Math Monday: A row gauge of your very own
Let me say this very carefully… ROW. GAUGE. DOES. MATTER.

If you’re not quite sure how to count your rows, read this.
I know lots of people say it doesn’t. “Make sure you get stitch gauge,” they say. “That that’s the most important thing.” Yes, of course you can just knit to a certain length in centimeters or inches and forget about row gauge entirely, but when length needs to be shaped - think neck depth or armhole depth - watch out! Trouble ahead.
So in the next few lessons of Math Monday, I’ll be showing you how to use your row gauge, rather than the pattern’s, to adjust for length.
But first, a word about gauge in general:
When you read a pattern, you see the designer has a particular stitch gauge and a particular row gauge. This is not an absolute. THIS IS THE GAUGE THE DESIGNER GOT WHEN S/HE WORKED UP THE GARMENT! If you do not get the same gauge, it does NOT (REPEAT DOES NOT) make you an inferior knitter. Every individual knitter knits differently. Designers are individuals. They knit differently from you and from each other. THEY HAVE NOT ACHIEVED THE “PERFECT” GAUGE.
However, they ARE correct for the pattern instructions they’ve written. So, in order to achieve the desired outcome following his/her instructions, you must get the gauge as written.
Using row/round gauge to adjust length
When I design a pattern, I almost always write the instructions first and then knit from my instructions (making me the first test knitter). Not every designer does this. Lots of designers knit a sample, taking notes so they can go back later and write the pattern.
Whenever I write the length of something that is unshaped (like the length of the body) in a pattern, I’ll say something like, Work until piece measures ____ “ [____ cm. However, in my test knit notes I’ll also jot down the number of rows I need to work based on gauge. How did I get this number? Simple.
Take the pattern’s row gauge per inch. If this is given per 4 inches*, then divide by 4. So if the pattern says that the row gauge is 26 rows per 4”, divide 26 by 4. This equals 6.5 rows per inch. If the length of the body is 12”, then multiply 12 by 6.5 for a total of 78 rows.
Now suppose you’ve swatched and you get stitch gauge but you’re only getting 25 rows per 4”. Will that make a difference? Let’s see. Divide 25 by 4 and you’ll get 6.25 rows per inch. If the length of the body is 12” then you’ll need to knit only 75 rows. If you knit 78 rows you’ll get 12.48”, about a half inch too much. Only 1 fewer row in 4 inches yields a half inch, so you can see where this is going.
You can also use this in another way. Suppose you’re getting row gauge, but want more (or less length) than the designer suggests. Yes, of course you can just work the piece longer, but how many more rows will you have to knit? Let’s see. If you want the length to be 14”, you’ll have to work 14 x 6.5 = 91 rows - 13 rows more than the designer intended. Remember, this will also mean you’ll need more yarn.
Next week: shaping
In next week’s post, we’ll work out how to do some of the length shaping if your row gauge isn’t quite right.
*Although this post also refers to round gauge, for simplicity’s sake, I only refer to row gauge. They are used interchangeably. I have also used inches and not centimeters. If you are using centimeters, most gauge is written as per 10 cms, so divide by 10 instead of 4.

Fudge Friday: Pattern Plus Stitches

Pickford, M. a free sock pattern in my Ravelry store.
At the beginning of some stitch patterns, right before the written instructions, it will say “multiple of 5 sts + 3” and you’ll wonder “What the heck does that mean?”
Those + stitches balance the pattern so that it begins and ends in the same way. Even if you don’t read charts, let’s take a look at this one.

A chart with plus stitches.
The red border around the first 10 stitches shows the pattern repeat. Those 10 sts are repeated over and over until the last 3 sts. Then stitches 11, 12 and 13 are worked. You can see that if we ended on stitch 10, the pattern wouldn’t be balanced. The way the pattern started wouldn’t look the same as the way the pattern ended.
For those of you still a bit confused (because of the chart), let’s look at the written instructions for Row 1:
*k1, p1, k1, yo, ssk, p5; rep from * to last 3 sts, end k1, p1, k1.
You can see here that if we ended on the last p5, the pattern would begin with k1, p1, k1. If we add on those 3 sts to the end, the pattern is now balanced, beginning and ending with k1, p1, k1.
What does this mean for you, the knitter? This means that we need to have a multiple of 10 stitches + 3 on our needles. Does 90 stitches work with this pattern? No! We need 93. When I first started knitting I assumed this meant I needed a multiple of 13 sts on my needles… 10 + 3. But multiples of 13 don’t work. For example, if I had 52 sts (13 x 4), I would be one stitch short. I need a multiple of 10 and then add 3 to that. So 53 sts would work.
However, plus stitches only appear when knitting something flat in rows. When you knit in rounds, the plus stitches need to disappear. Let’s take a look at the same chart in the round.

This is the actual chart I used for Pickford, M.
You can see here that the plus stitches” have disappeared. This is because if we end our round with a k1, p1, k1, there will be 2 repeats of k1, p1, k1 - one at the beginning of the round, one at the end. Instead, to knit this same pattern in the round, we eliminate the plus stitches. The pattern now becomes a multiple of 10 stitches, and for the non-chart readers, the instructions for Round 1 will read as:
*k1, p1, k1, yo, ssk, p5; rep from *
Any multiple of 10 stitches knitted in the round will work - 40, 50…300!
You may ask why you’d want to even know this. Well, I find that after knitters have been at it awhile, they often start to play around with design. Incorporating a pattern stitch into a plain stockinette design is sometimes the simplest way. Knowing how to change a stitch pattern from a knitting worked flat in rows to knitting worked in the round (or vice-versa) will give you the confidence to do this.


Math Monday: Counting - Part 2 - Rows/Rounds
Last week we took a look at counting stitches. This week we’ll be counting rows and rounds.
Before I start, I must say, this took me FOREVER to figure out. As much as it’s just counting, to me, it was always a question of whether you count what you see or you count some things you don’t see. I’ll explain. For purposes of the discussion, I’ll refer to rows (and not rounds) and then touch on special “round only” situations.

Cast-on row
Let’s begin at the beginning with the cast-on row. The cast on actually creates stitches. You can see them here, but this row does not count in your total number of rows. When instructions say, “Cast on 90 stitches and work 20 rows” it means just that. Do not be fooled into thinking that you only have to work 19 rows because the cast-on counts as a row. If you look carefully at where my finger is pointing, it looks like there are 2 Vs, but only 1 row has been worked. The first V is really the stitch formed on the cast-on. Again, do not count this V as a row!

The cast-on row and one knit row. Although 2 Vs appear, only 1 row has been worked.
The stitches that are looped on the needle do not count as a row. They are waiting to be worked into the next row.

Stockinette Stitch - 4 rows worked.
In the picture above, you can see 4 Vs (count vertically up the column of stitches between the red lines). The blue bar indicates the cast-on V which now fades into the background.
A little double check I use with Stockinette stitch is to remember that usually Row 1 is a knit row, and Row 2 is a purl row. This means that all the knit rows will be odd rows and all the purl rows will be even rows. In the picture above, you can see that I’m about to begin a knit row since the yarn is coming from the right. That means I’ve just completed an even (purl) row. Since 4 is an even number, I know that I’ve counted correctly. This also works with reverse Stockinette stitch, just remember that in this case, the purls are odd and the knits are even.

Right side

Wrong side
With garter stitch each ridge counts as 2 rows worked. However, sometimes, one side will have one fewer ridges than the other as in the two pictures above. If this is the case, then you have worked an odd number of rows. If both sides have the same number of ridges, you’ve worked an even number of rows. So, for example, if you have 5 ridges on one side and 4 ridges on the other, you’ve worked 9 rows. If you have 5 ridges on both sides, you’ll know you’ve worked 10 rows.
In garter stitch, though, be very careful. On one side of the work, the cast-on will appear to be a ridge.

Only 4 ridges here!
In the image above, the arrow points to a ridge of stitches which is really the cast-on. There are really only 4 ridges. Do NOT be fooled!
Finally, a discussion on rounds. Many times, you’re counting rounds as you complete them. If this is the case, just go ahead and count them the same way as you do for rows. However, if you’re like me, sometimes you’re counting rounds in the middle - either to check yourself (since there’s no right or wrong side) or to see how much longer you need to work for an increase or decrease. If that’s the case, know WHY. Do you want to know how many you’ve completed or do you want to know which round you’re working on?
If you want to know how many you’ve completed, count the rounds to the LEFT of you’re working yarn. If you want to know which round you’re working, count the rounds to the RIGHT of you’re working yarn.
Fudge Friday: Grafting stitches that aren’t “live”
You may have heard of grafting. The most common form is Kitchener stitch, which is usually used at the tip of the toes when knitting socks. It involves “live” stitches that have not been bound off and is done using a length of yarn and a tapestry needle.
A few years ago, I discovered a way to use grafting when joining two pieces of knitting that have already been bound off. It also uses a tapestry needle and a length of yarn. If the sweater is not terribly heavy, I use this type of grafting to join the shoulders of a sweater. I love it because it makes a nice neat seam that appears seamless and eliminates the bulk that most true seams have.
When doing this type of grafting, it’s important that you can pick out the stitches (Vs) in your knitting.
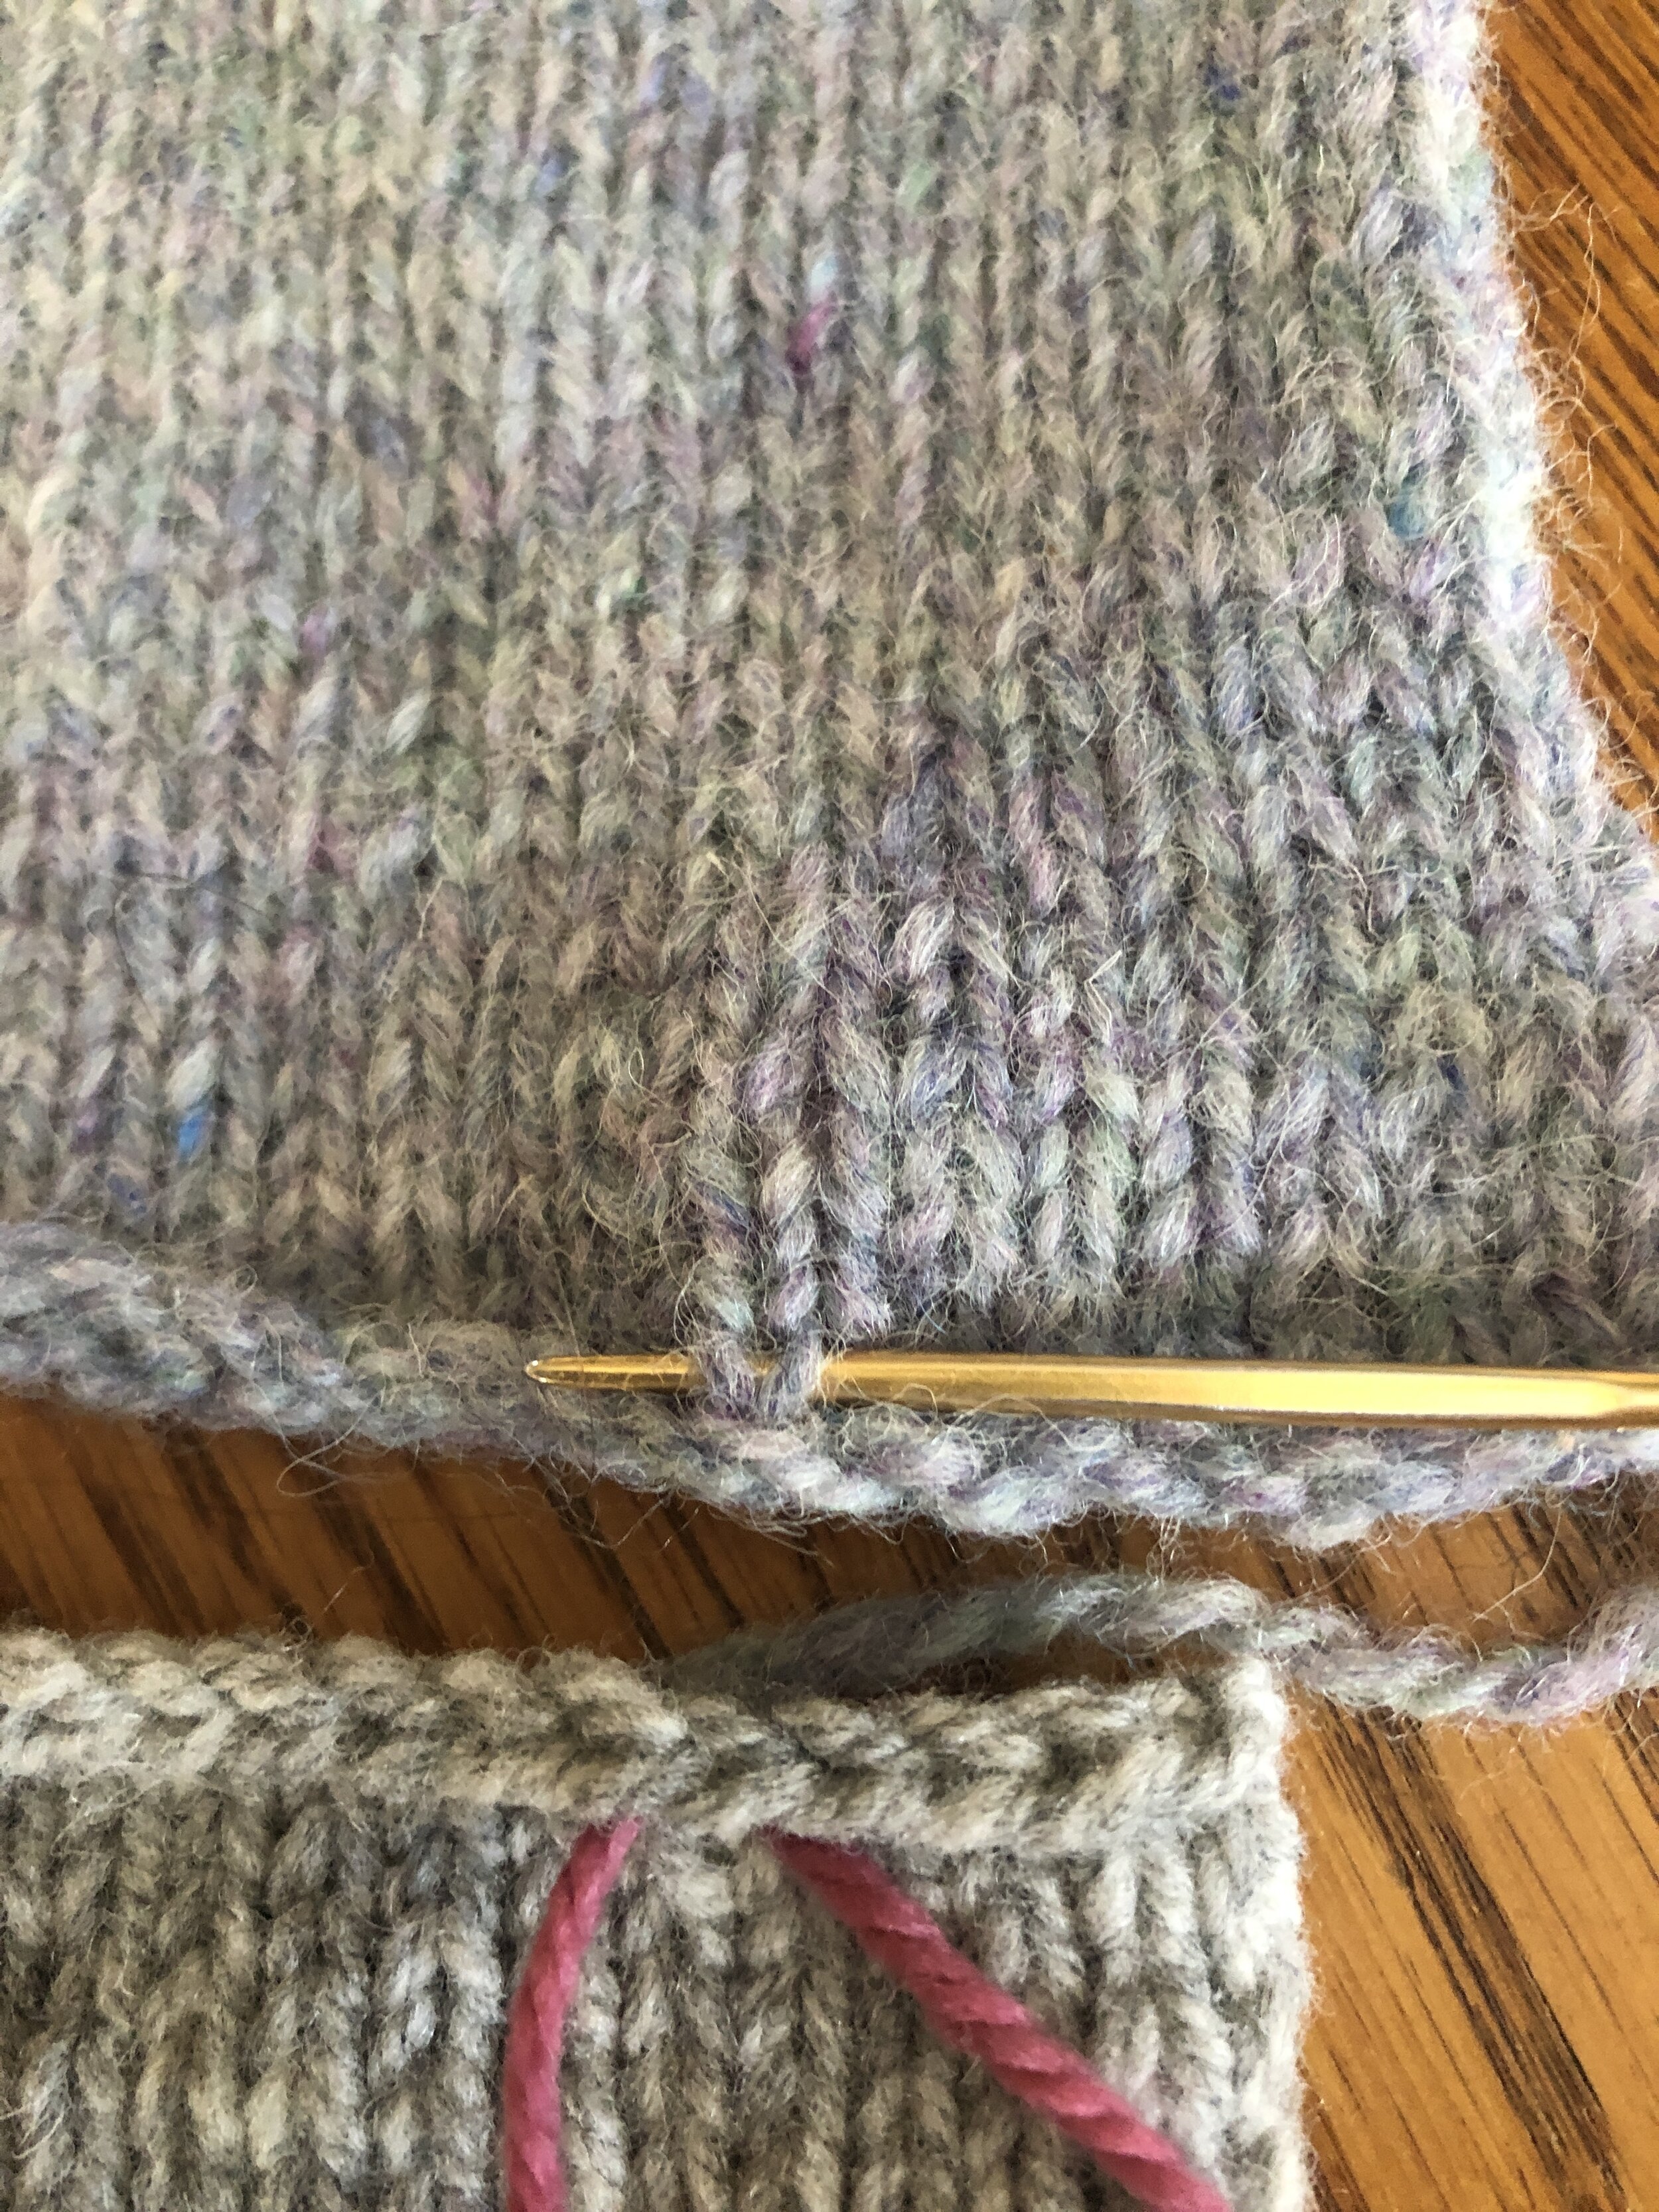
In this image, you can see the two pieces of knitting lined up, head to head. You can see I’ve outlined the stitches in both pieces in red. The piece at the bottom has stitches that look like Vs. The piece at the top has stitches that look like ^s, but that’s only because the piece is held upside down.
You should note that each stitch (V) consists of two legs, a right leg and a left leg.
Thread the tapestry needle with the yarn you used to knit your work. In my example, I’ve used a different color so you can better see it.
Beginning on the bottom piece and working from right to left:
Insert the needle on the right side of the right leg of Stitch #1 of the bottom piece from front to back.
Come up on the left side of the left leg of Stitch #1 of the bottom piece from back to front.
Insert the needle into the center of Stitch # 1 of the top piece from front to back.
Come up in the center of Stitch #2 of the top piece from back to front.
Insert the needle on the right side of the right leg of the next stitch of the bottom piece from front to back. (This will be the same space you came up out of in Step #2.)
Come up on the left side of the left leg of the same stitch of the bottom piece from back to front.
Insert the needle into the center of Stitch #2 of the top piece from front to back. (This will be the same space you came up out of in Step #4.)
Insert the needle into the center of the next stitch of the top piece from back to front.
Repeat from Step #5 - 8 until all the stitches have been used. You should see a long line of Vs over the seam. Pull tightly on both ends of the working yarn and Vs disappear into a perfect seam!
Here’s a little photo tutorial…

Steps 1 and 2.
Steps 3 and 4. Notice that the needle appears to be going under a V, but this is really the right leg of one stitch and the left leg of another because the top piece is shown upside down with the bound off edge at the bottom of the picture.

Steps 5 and 6.

Steps 7 and 8.
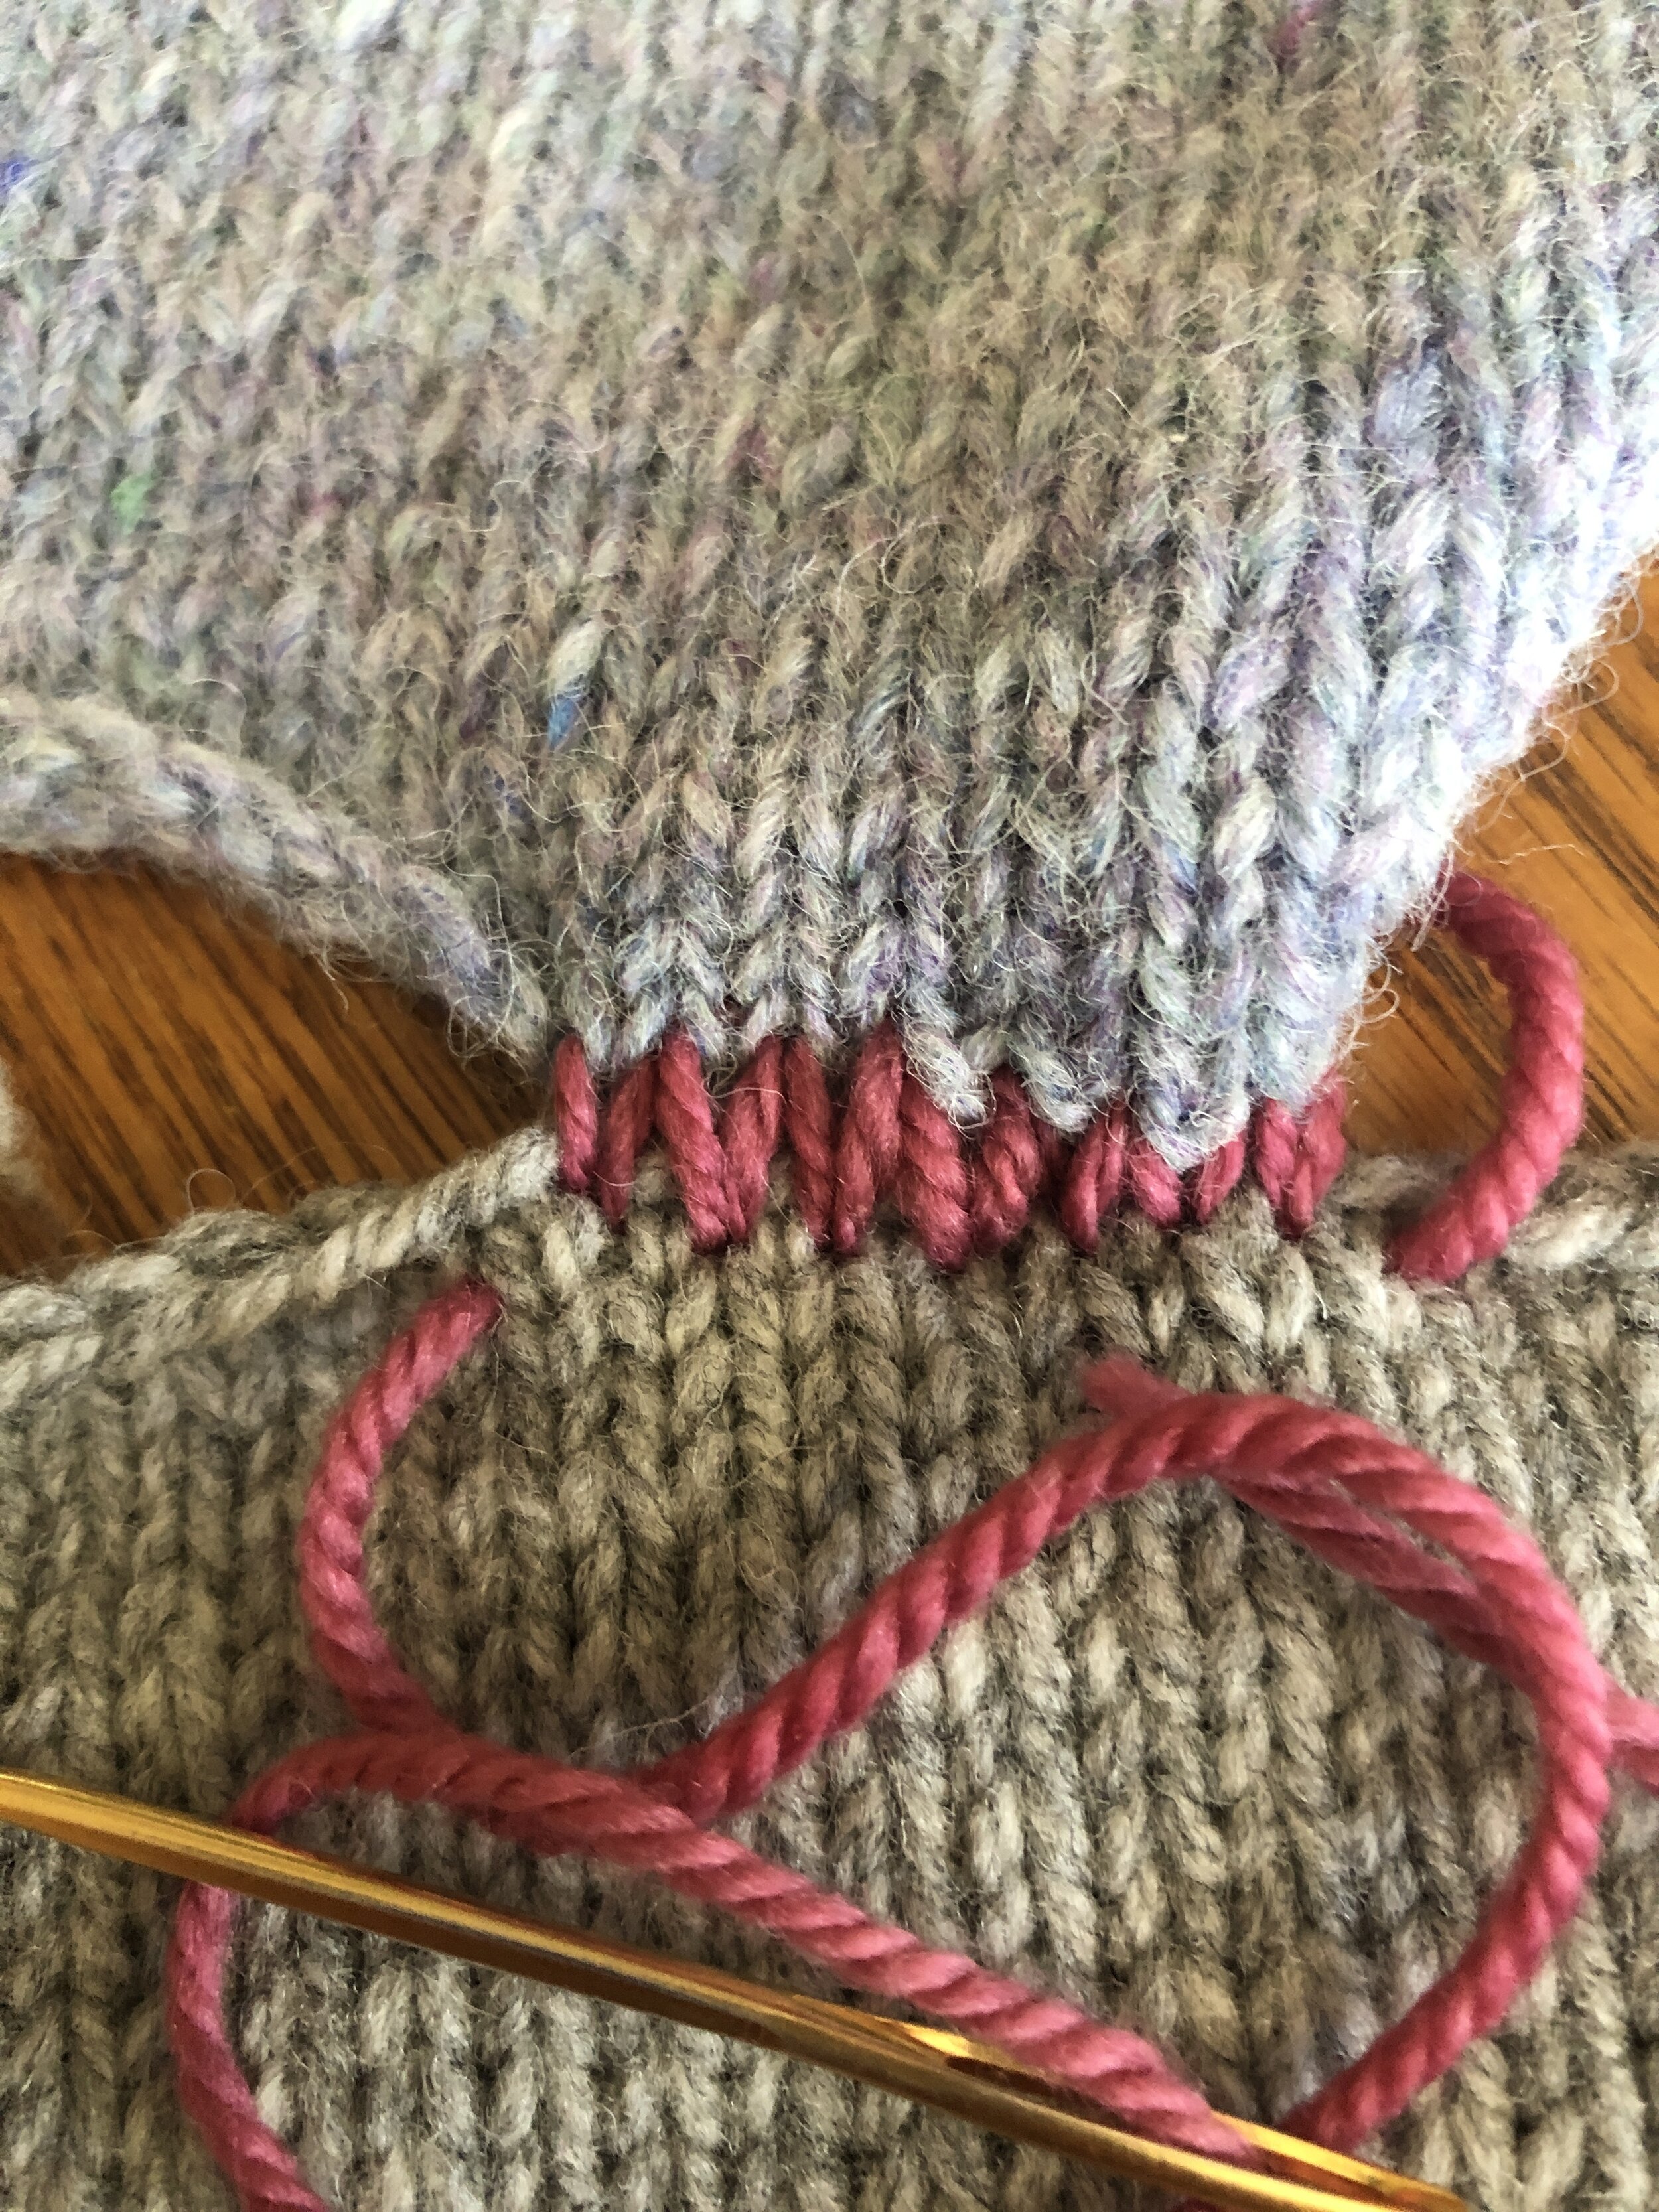
A long line of Vs emerge over the seam.

Pull tightly on both ends of the working yarn and the Vs disappear into a perfect seam.

Math Monday: Counting - Part I - Stitches
Before I became an elementary school teacher, I always thought that counting was the first thing you learned in math. It’s not! The first thing you learn is saying the numbers in order, really just chanting … 1 comes before 2 comes before 3, etc.
But … the second thing you learn in math is definitely counting which is really just one-to-one correspondence.
In knitting, counting can be tricky, but it’s critical to knitting. You’ll need to count stitches to make sure you’re on track in your pattern.
This week we’ll count stitches.
~~~~~~~~~~~~~~~~~~~~~~~~~~
This piece of knitting shown below is just plain Stockinette stitch — knit on the right side of the work, purl on the wrong side.
Each V represents a stitch.
In this picture, I’ve counted out 4 stitches.

Counting Stockinette stitches.
If you count carefully across the entire row, you will see that there are 22 Vs. I sometimes use a knit selvedge — knit the first and last stitch of every row — on my swatches, so you can see at the very beginning and very end something that looks like a knot. Those knots are actually a single stitch, so this swatch has 24 stitches — a selvedge stitch at the beginning (knot) + 22 stitches + a selvedge stitch at the end (knot). Go ahead, count the Vs. I’ll wait.
Things can become a bit more complicated in lace (where you’ll need to count the yarn overs) or cables (where some stitches disappear behind others), but the same basic principle applies. Count the Vs!

An example of counting stitches in lace.
I usually try to find the simplest (or the least complicated row), as in this lace example above, to count my stitches. For example. I’d never count the stitches in the row with the bobble. You can see that the row I’m counting bends a bit because of the first double decrease (Stitch #1). Stitches #6 and #12 are yarn overs, but you’ll need to count those too!

An example of counting stitches in a piece with cables. This swatch has Stockinette AND garter (knit every row), along with reverse Stockinette (purl on the right side, knit on the wrong side).
The cable example above is a bit more complex because it contains different kinds of stitches. They all won’t look like Vs. You can see the 3 Stockinette Vs at both ends of the cable (Stitches #1, 2, 3 and 9, 10, 11), but in the middle of the cable are 5 garter stitches (Stitches # 4, 5, 6, 7 & 8) that present as bars, although if you look carefully, you can see the Vs above the bars. You actually need to stretch out the cable to find Stitches #4 and 8 as they get covered up by the cable moving inward. Stitches #12, 13, 14 & 15 which are reverse Stockinette, also present as bars, but unlike the garter stitches, you cannot see the Vs above them.
Next week we’ll tackle counting rows and rounds.